
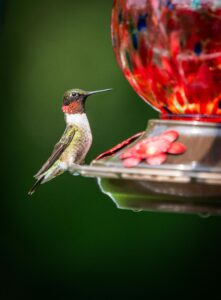
A ruby-throated hummingbird rests momentarily at a colorful glass nectar feeder.
With summer in full swing, it’s a good time to bring out your hummingbird feeder. For those who already own or are looking to add a feeder to their homes, the process of cleaning the feeder can seem confusing. We’re here to make it simple!
First, let’s explore why it’s essential to clean your feeder regularly. Hummingbirds are more likely to drink from a clean feeding station. They’ll even go without food rather than drink nectar that has gone bad. To keep them consistently visiting your feeder, you’ll want to make sure to add this cleaning routine.
Below are the steps to take when cleaning the feeder:
Step 1: Empty the feeder. (Be sure to empty all the food and do a quick rinse with hot water. Nectar can go bad, so we don’t want to reuse any.)
Step 2: Take apart your feeder.
Step 3: Soak the feeder in a mixture of mild cleaning solution of hot water and dish soap in a bucket or sink.
Step 4: Allow the feeder to soak for about 1 to 2 hours.
Step 5: Scrub your feeder using a cleaning mop or bottle brush. Be sure to remove any remaining nectar residue.
Step 6: Fill your feeder about ⅔ of the way with water and give a good shake!
Step 7: Rinse the feeder with cold water.
Step 8: Lay your feeder on a dish rack or towel and let it air dry.
Once your feeder is cleaned, it’s important to know how often you should be following this routine. A feeder should be cleaned at least once a week and the nectar should be replaced every 3 to 5 days. Remember to be mindful of the climate as well in the hotter months. With the heat and humidity, nectar can ferment and feeders may need to be cleaned more frequently to prevent mold buildup.
Taking the time to provide a clean feeding station for these speedy birds will not only be well appreciated but also a worthwhile reward to get the chance to view them up close this summer season.
— Erin Daehler
Visit the Perky-Pet website for helpful pictures and more tips on cleaning your feeder.